Welcome to Pickling 101. Today we’re making refrigerator pickles, a.k.a., quick pickles. This method preserves fruits and veggies (and edible scraps) in a brine. It’s way easier (and less intimidating) than the process for shelf-stable pickles, which are fermented, can suck up a whole weekend fussing with canning equipment, and come with a risk of botulism if done incorrectly. In refrigerator pickling, you’re essentially making a high-acid marinade that, when added to your cold fridge, works its way into fruit and/or veggies and keeps bacterial growth at bay.
Our go-to pickle recipe will work for anything—from melon rinds to a standard cuke, which, by the way, is also a melon. If you want to play with it (you should!), we’ve also given you a template to build your own pickle recipe. Try a few experiments, and you'll become a fridge-pickling master before you can pick a peck of peppers.
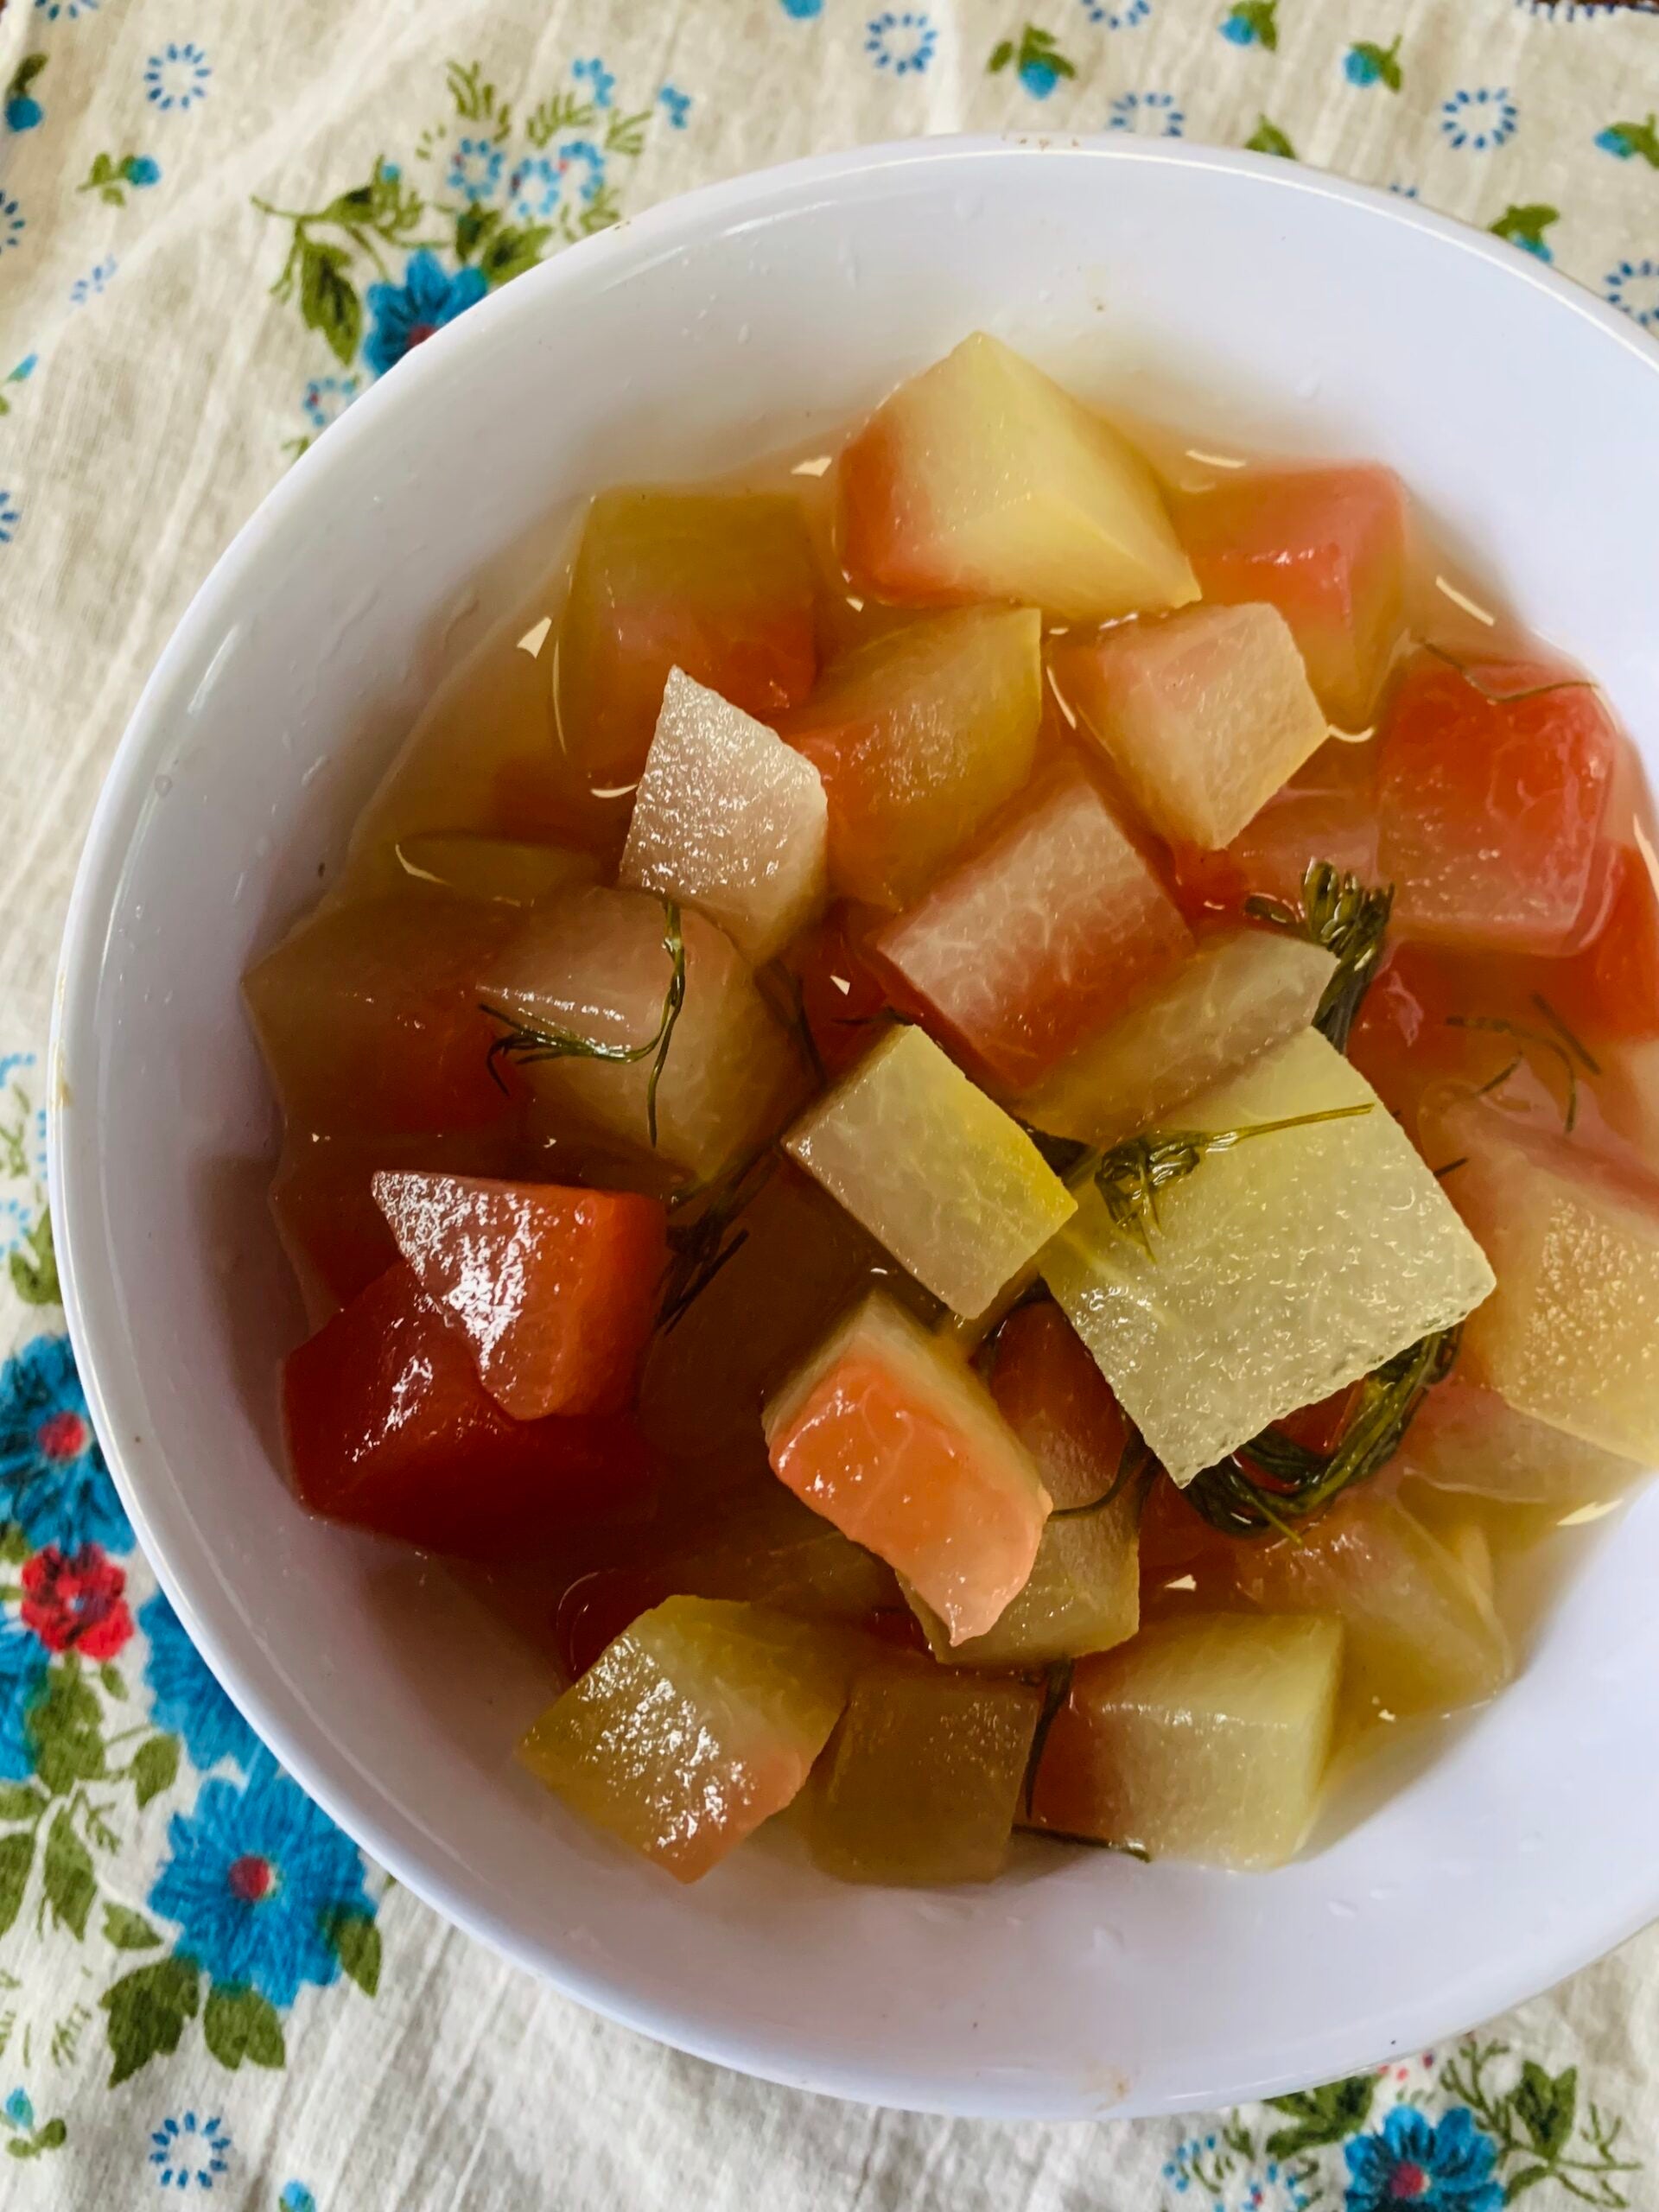
Garlicky Dill Pickled Watermelon Rind
Yield: 3 pints of pickles
Ingredients
- 4-5 cups watermelon rind, chopped and skin removed
- 2 cups water
- 1 cup rice vinegar
- 2 tablespoons Kosher salt
- 2 teaspoons granulated sugar
- 1 tablespoon yellow mustard seeds
- 4 garlic cloves, smashed
- 1 small bunch fresh dill, coarsely chopped (stems too!)
Procedure
- Combine water, vinegar, salt, and sugar in a pot and boil until the sugar and salt are completely dissolved.
- Add the watermelon rind and simmer until fork tender, about 5 minutes. Note: Most veg won’t need this parboiling step, but these rinds are tough.
- Add the garlic, mustard seed, and dill to clean, dry jars and carefully pour in the rinds and hot brine, ensuring the liquid covers the rinds.
- Let the jars cool uncovered on the counter, then seal and let them sit in the fridge for at least 24 hours.
- Taste the rinds daily until they reach your desired level of pickled zing.
- Store in the fridge for up to two months.
Fridge-pickling: An abbreviated masterclass
Pickling is an almost infinitely customizable endeavor. Once you’ve got the basic process down, you can get brine-y with anything you want, and mix-and-match flavors that mimic deli-counter staples or hit your tastebuds with something entirely new. All you need are these five steps:
Step 1: Wash and prep
Most veggies require zero prep beyond cleaning and cutting into your desired shape. Whether you slice, dice, matchstick, or spear, the rules here are loose. But here are a few guidelines:
- If your veggies are large, cut them into smaller pieces like coins, spears, half moons, or thin slices so they’ll absorb the brine faster.
- If your veggies are thin or teeny, leave them whole. Think asparagus, green beans (trim the ends), grapes, or blueberries.
- If you’d normally peel the veg, this rule still applies. Peels can slow down the pickling process for things like carrots, beets, parsnips, and garlic.
- If you want a “classic” pickle, seek out and spear Kirby cucumbers, which are shorter and have a thick skin that helps them retain a big crunch.
- If you want to use up melon rinds, they need a little tenderizing. Simmer them in the brine for about 5 minutes, or until they’re fork-tender.
Step 2: Add aromatics
The flavor profile of your favorite supermarket pickle comes from aromatics added to the jar. A classic bread-and-butter, for example, calls for mustard seed, celery seed, turmeric, and often cloves. All you really need to make pickles are produce and brine, but you can toss in pretty much anything to zhuzh it up. Consider playing around with:
- The onion family: smashed or peeled garlic, onions, shallots
- Chiles: whole dried, or sliced fresh
- Citrus: lemon, lime, orange zest
- Herbs: thyme, dill, bay leaf, rosemary, tarragon
- Spices: peppercorns, mustard seeds, coriander, star anise, cumin seed
Step 3: Mix the brine
You can scale a basic brine up or down as long as you maintain the right proportions. Most basic pickle recipes you’ll find online will have a 1:1 ratio of vinegar to water, but we recommend 1:2. We find equal parts vinegar and water a bit harsh, and it overpowers the flavor of the actual fruit or veg. To season the brine, add 2 tablespoons of Kosher salt and 2 teaspoons of sugar for every cup of vinegar. Throw it all in a pot and bring to a boil until salt and sugar are dissolved. White, rice, white wine, or apple cider vinegar all work, or you can use a combo—but avoid syrupy stuff like balsamic.
Step 4: Pack the jars
Layer the veggies and aromatics into clean, dry jars with tight-fitting lids and pour over the brine to cover completely. Let cool at room temperature, then seal and store in the fridge.
Step 5: Taste
Give the vinegar a day to start doing its thing, and sample the pickles daily until they hit your desired level of bite. Remember: These are called refrigerator pickles not pantry pickles, so keep ‘em the ice box, where they will last up to two months—give or take. You’ll know they’re no longer good to eat when they start to smell funky, go mushy or moldy, or when the brine gets cloudy or fizzy.